When remodeling a basement, the experts at Country Creek Builders recommend avoiding these features.
After 25+ years finishing basements throughout Lakeville, Apple Valley, Prior Lake, and the South Metro, we've seen countless homeowners fall in love with basement design ideas that look amazing on Pinterest or Houzz—only to regret those choices months or years later.
The problem isn't that these features are inherently bad. The problem is that what looks impressive in a staged photo doesn't always match how real families actually live. That trendy design element that worked perfectly for someone else's lifestyle might create daily frustration in yours.
At Country Creek Builders, we've completed 586+ projects across the South Metro, and we've developed a clear sense of which basement finishing decisions deliver lasting value versus which ones homeowners eventually wish they could undo. This isn't about judging anyone's taste—it's about sharing hard-won wisdom that can save you from expensive regrets.
Let's walk through five common basement features that seemed like brilliant ideas during the planning phase but created problems down the road. More importantly, we'll show you the better alternatives that deliver similar benefits without the downsides.
Picture this: You're a die-hard Vikings fan. Purple walls, team logos everywhere, a massive scoreboard-style TV cabinet, and stadium seating complete with cup holders. It looks like a miniature U.S. Bank Stadium in your basement, and for the first season, it's absolutely perfect.
Then your team has a terrible season. Or worse, your favorite player gets traded or embroiled in controversy. Or your teenagers bring friends over who root for Green Bay and find the whole shrine a bit intense. Or—and this is the most common scenario—you simply get tired of looking at the same theme day after day for years.
Themed basements create a specific problem: they age quickly and poorly. What feels exciting and personal during construction becomes limiting and sometimes embarrassing within a few years.
Themes date quickly. That industrial-chic exposed brick and pipe aesthetic from 2019 already looks tired in 2025. Design trends change faster than you'd expect, and permanent installations (built-in elements, wall treatments, custom cabinetry) become reminders of how dated your basement feels.
Tastes evolve. Your identity and interests shift over time. Today's passionate hobby might be next year's forgotten phase. We've seen Star Wars themed basements whose owners discovered they actually weren't that into Star Wars once they'd spent six months staring at vinyl wall decals of Darth Vader.
Family dynamics change. The basement designed as Dad's ultimate man cave becomes a problem when your teenagers need a space for their friends, or when you're trying to sell your home to buyers who don't share your passion for college basketball memorabilia.
Themes limit functionality. When everything in your basement screams "sports bar," it's difficult to use that space for other purposes. Try hosting your daughter's slumber party in a room with neon beer signs and sports team helmets on every surface.
Resale challenges. When the time comes to sell your home, potential buyers walk into your themed basement and either love it (rare) or can't get past it. They're calculating the cost to rip out your custom Vikings-purple built-ins and that scoreboard cabinet you spent thousands creating.
Smart basement design incorporates your personality and interests without making permanent installations that lock you into one theme. Here's the approach we recommend:
Create a neutral, high-quality foundation. Choose timeless finishes—classic paint colors, quality neutral flooring, simple trim styles. This foundation will look appropriate for decades regardless of changing trends.
Add personality through removable elements. Display your team jerseys in frames you can easily swap out. Use removable vinyl decals instead of permanently painted murals. Select furniture and accessories that reflect your current interests but can be changed without renovation.
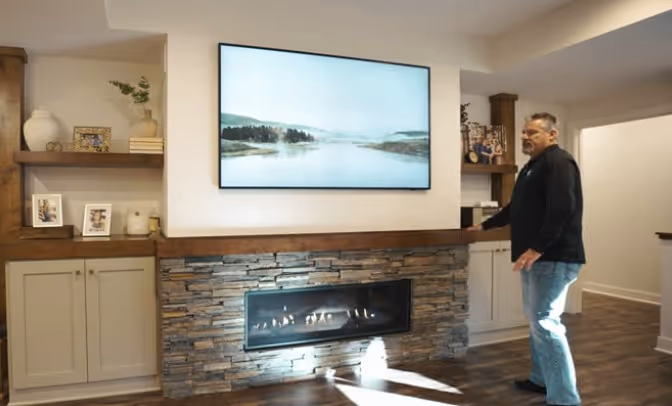
Design multi-functional spaces. Instead of a dedicated sports watching area, create a flexible entertainment zone. The same space works for game day parties, movie nights, kids' gatherings, or work-from-home overflow as your needs change.
Invest in quality where it matters. Put your money into excellent lighting (dimmable, controllable, appropriate for various activities), superior sound systems (great for sports, movies, or music), and comfortable, movable furniture rather than permanent themed installations.
Create display flexibility. Built-in shelving is fine—but design it to display anything, not just football helmets. Use lighting and glass doors that make collections look intentional, whether those collections are sports memorabilia today or your kid's art projects tomorrow.
One of our Lakeville clients wanted a Green Bay Packers basement—gold and green everything, with custom built-ins designed specifically for helmet displays. We convinced him to go with neutral grays and dark wood cabinets, then used removable elements (framed jerseys, team throw pillows, area rugs) to achieve the Packers feel. Five years later, he's thank us repeatedly. His family uses the space for everything—homework, crafts, entertaining, movie watching—and he simply swaps out the Packers décor when needed for other functions. During selling season, those team elements come down entirely, presenting a beautiful, neutral entertainment space to potential buyers.
Here's a mistake we see constantly: homeowners budget heavily for their basement bar, entertainment center, and premium flooring—then run out of money for proper lighting and settle for basic recessed cans on a single switch.
The result? A basement that technically has lights but still feels dark, gloomy, and unwelcoming. It's the classic complaint we hear six months after project completion: "I don't know why, but nobody wants to hang out down there. It just feels... off."
Lighting is the most underestimated element of basement finishing. It's also the element that has the most dramatic impact on whether your basement feels like an inviting living space or a depressing dungeon you avoid using.
Basements lack natural light. Upstairs rooms benefit from windows that flood spaces with daylight, changing throughout the day and making rooms feel alive and connected to the outdoors. Basements have limited window options (and even those are often small egress windows), making artificial lighting the only source of illumination.
Single-type lighting doesn't serve multiple functions. That row of recessed cans works fine for general illumination but creates glare on TV screens, doesn't provide good task lighting for homework or crafts, and feels harsh for evening entertaining or relaxation.
One-switch lighting prevents atmosphere. When all your basement lights are controlled by a single switch, you get one setting: full brightness or complete darkness. You can't create the cozy, dimmed atmosphere you want for movie night, the bright task lighting you need for the kids' homework station, and the subtle ambient glow that makes evening gatherings feel inviting.
Poor lighting makes basements look cheap. Even with premium finishes, inadequate lighting makes your basement feel unfinished and cave-like. Guests unconsciously perceive poorly lit spaces as lower quality, even when materials and craftsmanship are excellent.
Safety issues arise. Stairs, especially, need excellent lighting for safety. We've seen too many basement designs that treat stairs as an afterthought lighting-wise, creating legitimate trip hazards.
Professional basement design incorporates multiple lighting types working together to create flexibility and atmosphere:
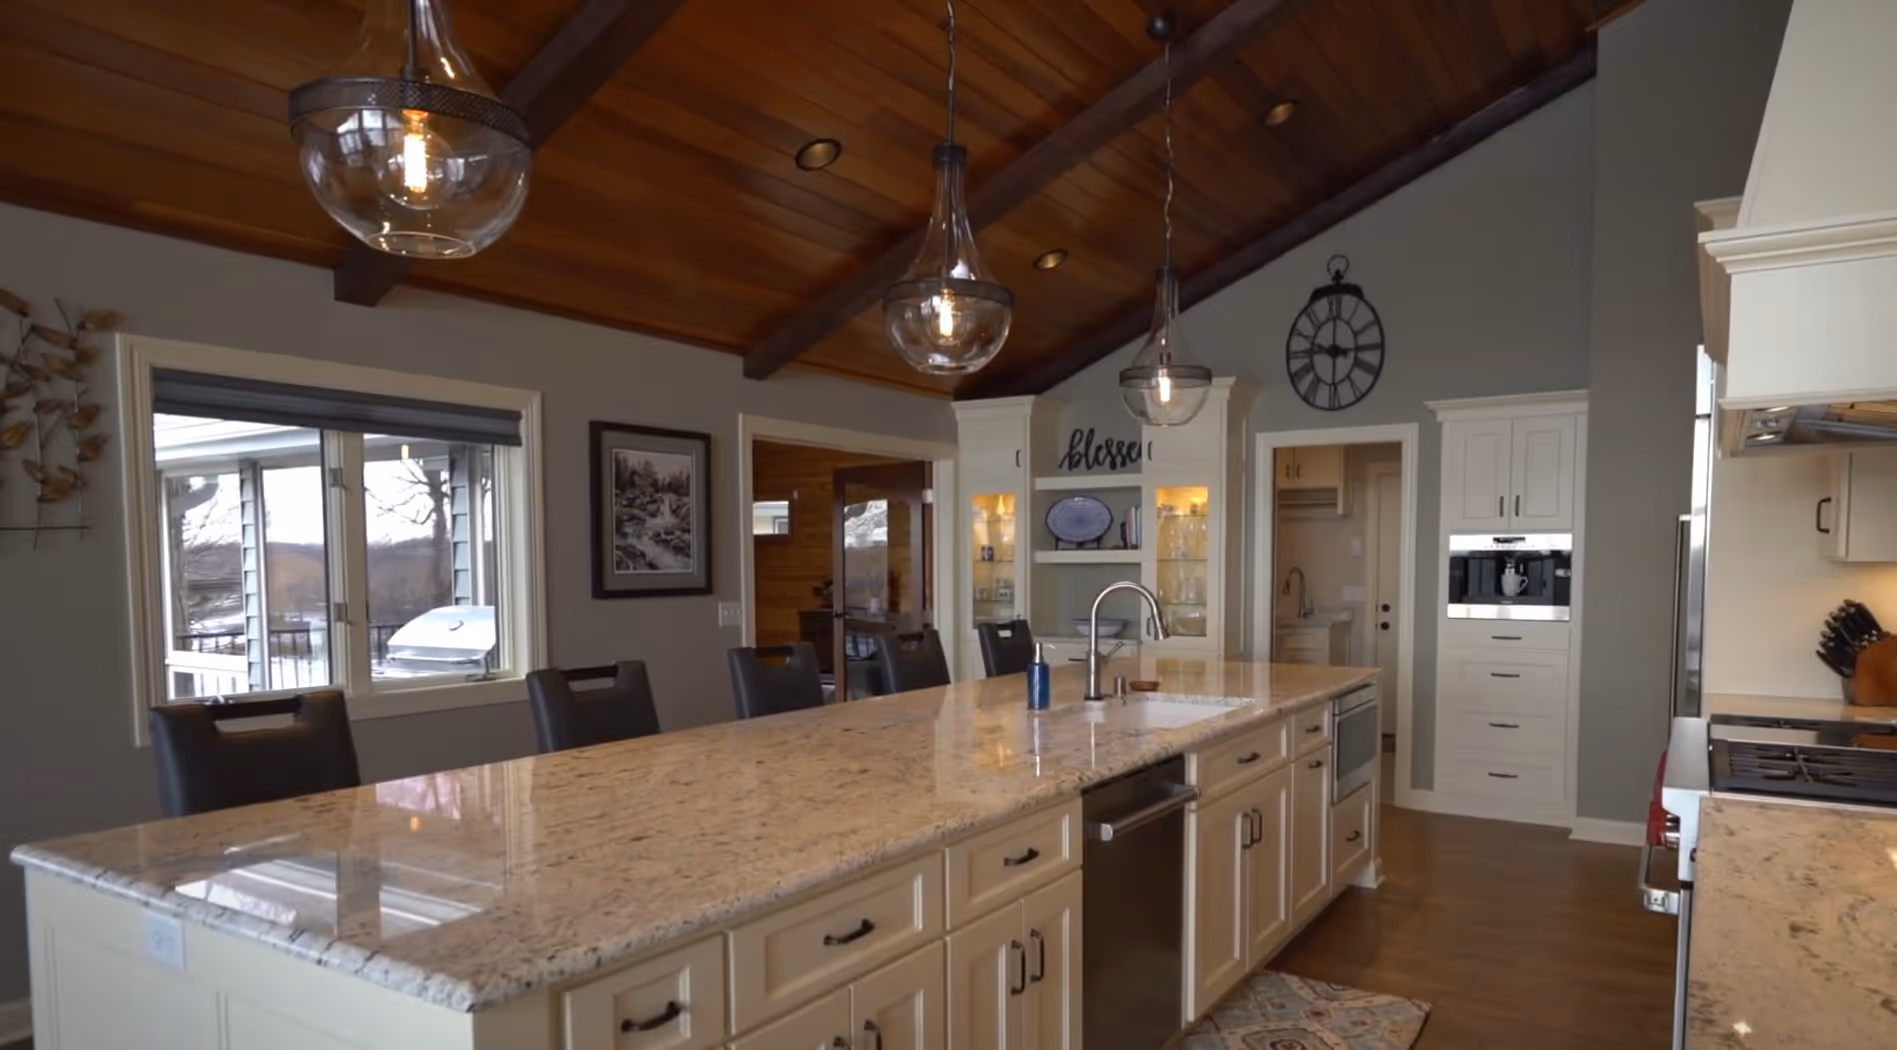
Ambient lighting (general illumination): Recessed ceiling lights on dimmers provide overall illumination. We typically space these 4-6 feet apart in living areas, ensuring even lighting without dark corners. Dimmers are non-negotiable—they allow you to adjust brightness for different activities and times of day.
Task lighting (specific work areas): Areas where people actually do things need dedicated task lighting. That means under-cabinet lights for bar prep areas, reading lights near seating, pendant lights over pool or game tables, and excellent lighting at desks or craft stations.
Accent lighting (visual interest and atmosphere): This includes LED tape lighting behind TV cabinets, lighting inside glass-front cabinets to display collections, toe-kick lighting that creates a floating effect on cabinetry, and backlighting on floating shelves. Accent lighting transforms a basic basement into a sophisticated space.
Natural light maximization: Where possible, we incorporate large egress windows, glass block windows, or even light wells that bring in actual daylight. While basements will never be as bright as main floor spaces, every bit of natural light makes a significant difference in how the space feels.
Smart lighting controls: Modern lighting control systems (we often use Lutron) allow you to create scenes—preset combinations of lights at different dimming levels. One button press creates "Movie Night" (accent lights at 20%, ambient lights off, stair lights dimmed to 10%). Another creates "Party Mode" (everything bright). Another creates "Late Night" (minimal lighting for that midnight snack run).
Our typical basement lighting design includes:
Is this lighting package more expensive than basic recessed cans on one switch? Absolutely. It adds $3,000-$7,000 depending on basement size and complexity.
But here's what we tell homeowners: lighting is the one element that affects your enjoyment of the space every single time you use it. Skimp on the wet bar size if budget demands—you'll adapt. But skimp on lighting, and your entire basement will feel disappointing forever.
You've created a fantastic basement entertainment zone—big TV, surround sound, comfortable seating. It's perfect for family movie nights, the kids' video game sessions, and Sunday football parties. There's just one problem: every sound from the basement echoes through the entire house.
Sleeping toddlers wake up from basement parties. You can't work from your home office when the kids are gaming downstairs. Late-night movie watching disturbs family members trying to sleep upstairs. The basement you created to give your family more space has actually made your home less livable because of noise transmission.
Sound insulation is one of the most commonly overlooked elements in basement finishing, despite being relatively inexpensive to address during construction. Once your basement is finished, adding sound insulation is extremely costly—you'd have to tear out ceilings and walls to access the spaces where insulation belongs.
Floor/ceiling assembly transmits sound efficiently. Your basement ceiling is someone's floor—and without proper insulation and sound-dampening strategies, every footstep, voice, and media system operates like a speaker broadcasting into the basement.
HVAC ductwork creates sound highways. Air ducts running between floors carry sound remarkably effectively. Voices and noise travel through ductwork, emerging through vents in other rooms throughout your home.
The stairwell acts as an amplifier. Open stairwells connecting basement to main floor create a direct sound path. Without proper doors or sound absorption, the stairwell broadcasts basement noise throughout the home.
Entertainment systems are designed to be loud. Surround sound systems and powerful TV speakers fill basement spaces with sound—which then transmits through ceiling assemblies to the rooms above.
Teenagers exist. We say this with love, but teenagers use basements loudly. Music, gaming, friends talking and laughing—all at volumes that seem designed to maximize parent annoyance. If you're finishing a basement for teen hangout space and you skip sound insulation, you'll regret it approximately three weeks after their first basement party.
Home theater use conflicts with normal household rhythms. The best time to watch movies is evening and late night—exactly when other family members are trying to sleep or concentrate. Without sound insulation, your basement home theater becomes something you can only use when nobody else is home.
Professional basement finishing incorporates multiple sound-control strategies:
Sound-batt insulation in ceiling joists: We install sound insulation batts between floor joists before the drywall ceiling goes up. This is your primary defense against sound transmission between floors. Sound batts cost approximately $0.75-$1.50 per square foot of ceiling—meaning a 1,200 square foot basement ceiling adds $900-$1,800 for this critical feature.
Resilient channel installation: These metal channels attach to ceiling joists and hold the drywall, creating a small air gap that dramatically reduces sound transmission. Combined with sound batts, resilient channels reduce sound transfer by 50-70%.
Solid-core doors with proper seals: Standard hollow-core doors do almost nothing for sound control. Solid-core doors with proper weatherstripping and threshold seals prevent sound from escaping through doorways.
HVAC duct mufflers: Installing duct silencers at strategic points reduces sound transmission through the HVAC system. These aren't always necessary for every basement, but in homes where ducts create clear sound paths between floors, they're invaluable.
Strategic room placement: When planning your basement layout, position the noisiest spaces (home theater, game areas) away from bedrooms above. Put your quieter spaces (guest bedrooms, craft rooms) directly under main floor bedrooms where they'll create minimal disturbance.
Sound-dampening design elements: Area rugs, acoustic ceiling tiles (in utility areas), upholstered furniture, and fabric wall hangings all absorb sound, reducing echo and making spaces acoustically comfortable.
We include sound-batt insulation in all our basement finishing projects as standard practice. It's non-negotiable because we've seen too many homeowners regret skipping it. The modest cost during construction ($900-$2,500 typically) prevents a problem that would cost $10,000-$20,000 to remedy after the fact (and involve tearing out and replacing your entire finished ceiling).
Your finished basement looks amazing—custom bar, beautiful built-ins, perfect paint colors. Then, three years later, your flooring starts failing. Carpet shows wear paths, stains that won't come out, and a musty smell that never quite disappears. That inexpensive laminate flooring is separating at the seams, and the corner that's slightly damp is starting to bubble and warp.
Suddenly your beautiful basement looks worn and shabby. And because flooring spans the entire space, replacing it means moving every piece of furniture, disrupting every area, and spending thousands you weren't planning to spend.
We see this mistake constantly: homeowners invest properly in permanent elements (framing, electrical, plumbing, cabinetry) but try to save money on flooring because they're exhausted by ever-escalating project costs. That budget flooring becomes the element that makes the entire basement feel cheap and that requires replacement far sooner than it should.
Basements present unique flooring challenges. Concrete subfloors remain cooler than main floor substrates. Humidity levels fluctuate more than upstairs. Even properly waterproofed basements can experience occasional moisture events. Cheap flooring materials fail under these conditions.
Quality differences are substantial. The difference between builder-grade and mid-range flooring might be $3-$5 per square foot, but the performance differences are dramatic. Builder-grade materials show every bit of wear, stain easily, and start looking shabby within 2-3 years. Mid-range materials maintain their appearance for 10+ years under the same use.
Flooring spans your entire basement. While you can live with builder-grade paint or basic light fixtures, flooring covers every square foot of your basement. Its quality affects your perception of the entire space every single time you use it.
Replacement is disruptive and expensive. Once your basement is finished and furnished, replacing flooring is exponentially more complicated than installing it during initial construction. Furniture must be moved, rooms become unusable during installation, and you're paying labor costs on the high end of the range because the job is more complex.
Moisture damage isn't repairable. If basement moisture affects your flooring (warped laminate, moldy carpet, delaminating vinyl), you can't just repair the damaged section—you need to replace all the flooring because discontinued products or dye lot differences will never match.
Smart basement flooring combines durability, moisture resistance, and comfort:
Luxury Vinyl Tile (LVT) for main spaces: Modern LVT has transformed basement flooring. It looks like wood or stone, feels warmer underfoot than tile, handles moisture beautifully, and lasts 15-20 years even in high-traffic basements. Mid-range LVT ($4-$7 per square foot installed) dramatically outperforms cheap alternatives.
We typically use LVT in basement bar areas, entertainment zones, bathrooms, and hallways. It's 100% waterproof, so that inevitable spilled drink or overflowing laundry sink won't damage your flooring. It's also easier on feet and backs than tile for spaces where people stand for extended periods (like bar areas).
Quality carpet in bedroom and lounge areas: While carpet in basements has fallen out of favor (moisture concerns are legitimate), the right carpet in the right locations works beautifully. We use carpet in basement bedrooms and dedicated TV viewing areas where you want the comfort and warmth carpet provides.
The key is using basement-appropriate carpet with moisture-resistant backing, anti-microbial treatments, and in areas that aren't directly exposed to potential water events. And we're talking about mid-range carpet ($4-$6 per square foot installed)—not builder-grade stuff that mats down within months.
Strategic tile use: Porcelain tile works brilliantly in basement bathrooms, mudroom areas, or around wet bars where spills are inevitable. However, tile throughout an entire basement feels cold and hard—it's not the comfortable living space most families want. We use tile selectively in wet areas, transitioning to LVT or carpet for main living zones.
Proper subfloor preparation: Regardless of which flooring type you select, proper subfloor preparation is critical in basements. This includes:
Our typical basement flooring approach: 60-70% LVT in bar, entertainment, bathroom, and hallway areas; 30-40% quality carpet in bedrooms and lounge zones. This combination provides moisture resistance where needed, comfort where desired, and a cohesive look throughout.
The investment difference? Budget flooring throughout a 1,200 square foot basement might cost $4,500. Our recommended approach costs $6,000-$7,500. That $1,500-$3,000 difference buys you flooring that will still look great in a decade rather than showing its age within three years.
You're finishing your basement for exactly how your family lives right now. The kids are 8, 10, and 12—so you create the ultimate kid zone with built-in bunk beds, a massive craft area, and a play structure. You install permanent dividers creating three small kids' rooms.
Then something predictable happens: your kids grow up. Those built-in bunk beds can't accommodate teenagers. That craft area is wasted space a high schooler never uses. Those three small rooms would work better as one large teen hangout space and one bedroom.
But everything is built-in, permanent, and expensive to modify. You're stuck with a basement perfectly designed for the family you were five years ago rather than the family you are today.
The failure to plan for changing needs is one of the most regrettable basement finishing mistakes. Unlike upstairs rooms which typically have fairly stable purposes (master bedroom remains a bedroom, kitchen remains a kitchen), basement spaces often need to evolve as families progress through different life stages.
Family needs change faster than you expect. The five-year span from when kids are in elementary school to when they're in high school brings massive lifestyle changes. The basement that perfectly served your young family becomes misaligned with teenage needs, empty-nest entertaining, or work-from-home requirements.
Permanent built-ins prevent adaptation. That custom-built homework station with six individual desk cubbies for your five kids and one parent helper? It's an expensive, space-consuming white elephant once kids are grown or your family's needs shift.
Small, dedicated rooms limit utility. Three 10x10 foot kids' rooms might make sense today, but what happens when you only need one guest bedroom and would prefer one large entertaining space? Those permanent walls you installed make adaptation expensive.
Technology infrastructure becomes outdated. The extensive wiring you installed for that specific A/V setup seems wasteful five years later when wireless technology has made it unnecessary. The permanent desk arrangement you built around a desktop computer station looks silly in a world of laptops and tablets.
Life stages shift. Today you're a young family needing kids' play space. In ten years you're empty nesters who'd rather have a guest suite for visiting children and grandchildren. In twenty years you might need a separate apartment for aging parents or for providing accessible main-floor living for yourself. The inflexible basement can't adapt to these predictable life transitions.
Smart basement finishing anticipates change rather than locks you into one configuration:
Design around zones, not dedicated rooms. Instead of creating three small permanent bedrooms, create larger flexible spaces that can be divided temporarily with furniture arrangement, curtains, or decorative screens. Today this is kids' sleeping quarters. Tomorrow it's a multi-purpose room for whatever your family needs.
Keep walls movable where possible. Obviously load-bearing walls can't move, but interior partition walls in basements are typically non-structural. When framing these, consider using methods that allow for easier future reconfiguration. At minimum, avoid running expensive permanent elements (built-in cabinetry, complex electrical) along walls you might someday want to remove or relocate.
Invest in infrastructure, not specific built-ins. Rough in plumbing for a future bathroom even if you're not building it now. Install electrical circuits generously throughout the space, providing outlets and switches where they might someday be needed. Run network cabling or conduit to multiple locations. This infrastructure investment allows future reconfiguration without major construction.
Choose furniture-based solutions over built-ins. Rather than built-in bunk beds, use quality stand-alone beds you can replace as kids grow. Instead of permanent desk cubbies, use modular furniture that can be rearranged. Rather than built-in toy storage, select attractive storage furniture that can store different things as needs change.
Design egress windows for multiple potential uses. If you're installing egress windows (required for legal bedrooms), locate them where they'll serve multiple possible room layouts rather than locking you into one bedroom location.
Create quality neutral spaces. As discussed in the themed basement section, neutral high-quality finishes allow the space to serve different purposes over time. Today's kids' playroom becomes tomorrow's home gym becomes the next decade's home office—all without requiring finishes changes.
Plan for reasonable expansion. If you know you might need a second bathroom someday, rough in the plumbing now even if you're not finishing that bathroom immediately. If you think you might eventually want a wet bar, rough in the plumbing and electrical even if you're installing just a dry bar today. These modest upfront investments ($1,500-$3,000 typically) prevent expensive future construction.
One of our Prior Lake clients perfectly exemplifies this flexible approach. Rather than creating three small permanent bedrooms for their kids, we designed one large bedroom zone with movable partition furniture that creates temporary privacy. The large space accommodates bunk beds and individual study areas today. When their teenagers want separation, the furniture can be rearranged. When the kids move out, the entire area becomes an expansive guest suite or entertainment zone—no demolition or construction required.
We also roughed in plumbing for a second bathroom location they didn't need immediately, and ran electrical circuits to multiple locations throughout their basement. Five years later, they added that second bathroom for $8,000 rather than the $20,000+ it would have cost without the rough-ins we installed during initial construction.
Everything we've recommended—avoiding overly themed elements, investing in proper lighting, including sound insulation, selecting quality flooring, and designing for flexibility—costs more than the budget alternatives.
Is this extra investment justified? Let's talk specific numbers:
Sound insulation adds: $1,000-$3,000 depending on basement size
Proper layered lighting vs. basic: $3,000-$7,000 additional
Mid-range vs. budget flooring: $1,500-$3,000 additional for 1,200 sq ft
Flexible design infrastructure: $1,500-$5,000 for rough-ins and future-proofing
Neutral high-quality finishes vs. themed: Often no cost difference, just better choices
Total additional investment for a 1,200 sq ft basement: $7,000-$18,000
That might sound like a lot. But consider:
Your basement finishing project likely costs $85,000-$140,000 total. These smart upgrades represent 5-13% of your total investment—but they affect your enjoyment and utility of the space every single day for decades.
Compare this to the alternative costs:
Spending an extra $7,000-$18,000 during initial construction prevents $40,000-$100,000 in potential future remediation costs. More importantly, it ensures you actually enjoy using your basement rather than tolerating its limitations.
At Country Creek Builders, our in-house design services specifically address these common regrets before they happen.
During our design process, we ask questions that help you avoid these mistakes:
These aren't upselling questions—they're genuine design inquiries that help us create basements you'll still love a decade from now.
We also provide guidance about where it makes sense to invest more versus where budget options work fine. For instance:
Invest more in: Lighting, flooring, sound insulation, infrastructure rough-ins
Budget options work fine for: Paint colors, basic fixtures, some trim styles
Our pricing tiers reflect this wisdom. Our Tier 1 basement finishing projects ($85,000-$100,000) include proper lighting planning, sound-batt insulation, and quality LVT/carpet flooring combinations as standard features—not expensive upgrades. These elements are fundamental to creating a basement you'll actually want to use.
The theme connecting all five of these regrets is the disconnect between how you imagine using your basement and how you'll actually use it over years and decades.
That themed sports bar looks amazing in your mind—but real life involves kids doing homework, family movie nights, guests gathering for non-sports events, and eventual resale considerations.
That budget flooring seems like smart economizing—until it shows every bit of wear within three years and makes your expensive basement look cheap.
Those permanent built-ins feel custom and special—until your family's needs change and that custom feature becomes an obstacle rather than an asset.
At Country Creek Builders, we've finished hundreds of basements across Lakeville, Apple Valley, Prior Lake, and the South Metro. We've seen which features deliver lasting value and which ones homeowners eventually regret. This wisdom isn't theoretical—it comes from helping families live with the basements we've built and learning from their experiences.
Our goal isn't to push expensive upgrades you don't need. It's to help you make informed decisions that create a basement you'll genuinely use and enjoy for decades—not a space that looks amazing in Instagram photos but frustrates you in daily life.
Contact Country Creek Builders to schedule your no-pressure consultation. Let's design a basement that will still make sense for your family five, ten, and fifteen years from now—not just today.
Your basement should enhance your lifestyle for decades. Let's make sure it does.
We're based out of the South Metro Twin Cities, and we serve both


.avif)
.avif)
.avif)

.avif)
.avif)